Bias / Documentation / Quick Start
Quick Start
This page takes you from the USB cable to a processed track on the SD card. You need a TASCAM Model mixer and a Mac on macOS 13 or later with at least one Audio Unit effect installed.
-
Connect and open Bias
Plug the mixer into the Mac over USB and switch it on. Open Bias. The first time, macOS asks to let Bias use the microphone. Allow it. The mixer's USB channels reach the Mac as audio input. Without microphone access, the inserts hear nothing.
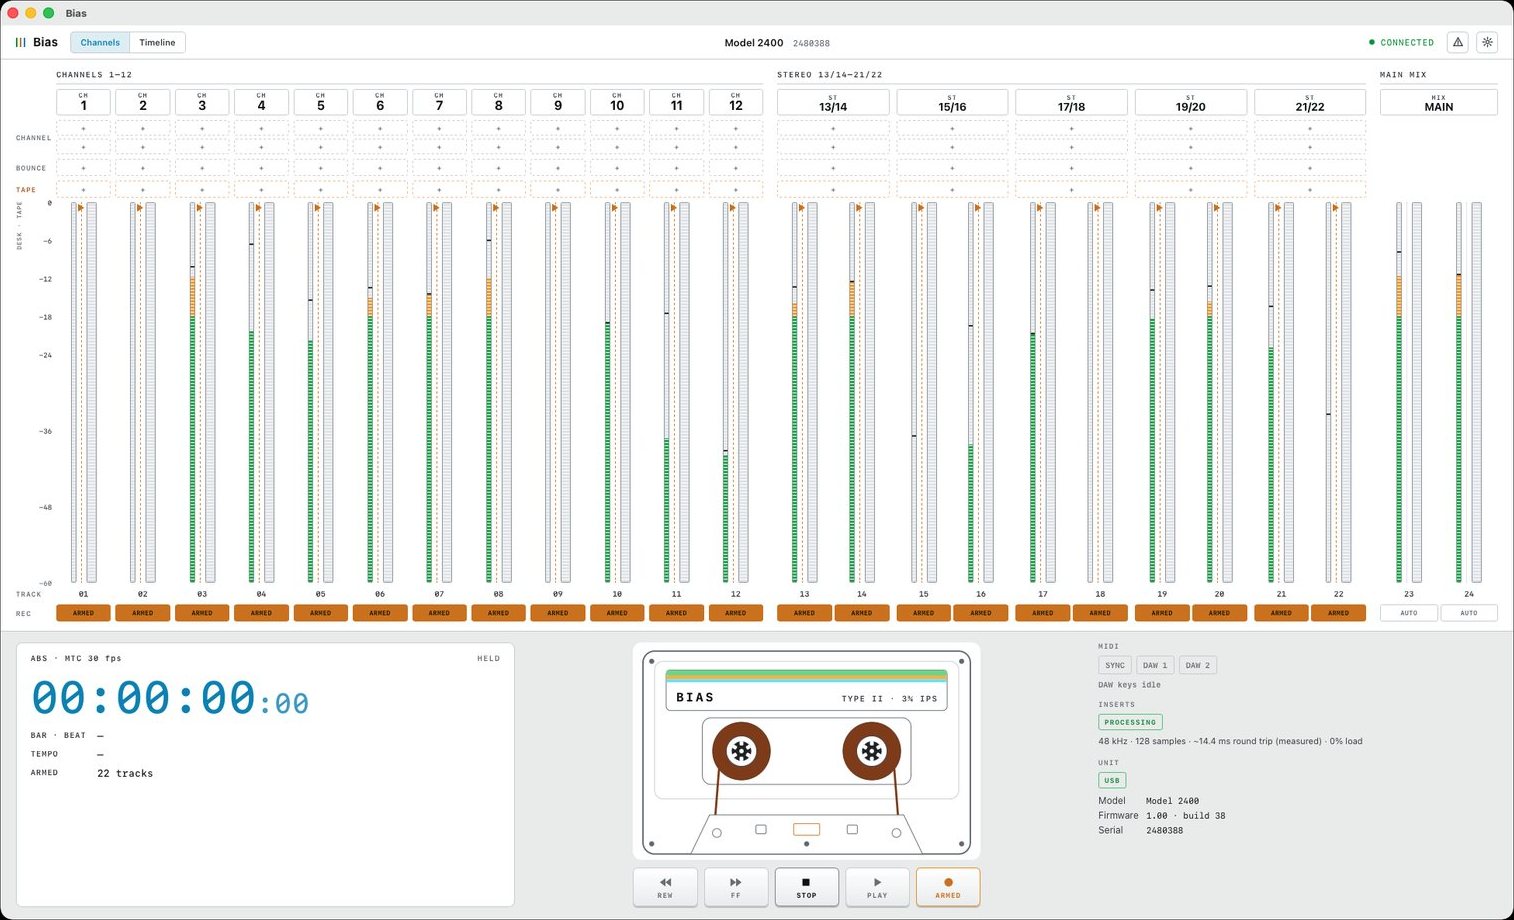
The Channels view opens with the meter bridge across the top and the deck below. Connected at the top right means Bias found the unit.
-
Set the channel switch
Every channel has a three-position source switch for analog in, USB and playback. For a first run, set one channel as the table shows.
Goal Switch Track through inserts and print them USB Play back what was printed Playback Straight input, no inserts Analog in If the mixer has a REC OUT switch, keep it off on any channel set to USB. If its menu has an MTR/USB SEND POINT, set the send point to PRE CMP. Otherwise the return goes back to the Mac and feeds itself. Bias mutes the loop within a fraction of a second, but keep the monitors down the first time you set up a channel.
-
Load an insert
Each strip has two insert slots for your own effects, plus a Bias Bounce slot and a Bias Tape slot, stacked under its meter. Click an empty slot and pick an effect from the list. Type in the search field to narrow the list. The plugin loads with its editor open in the dock on the right.
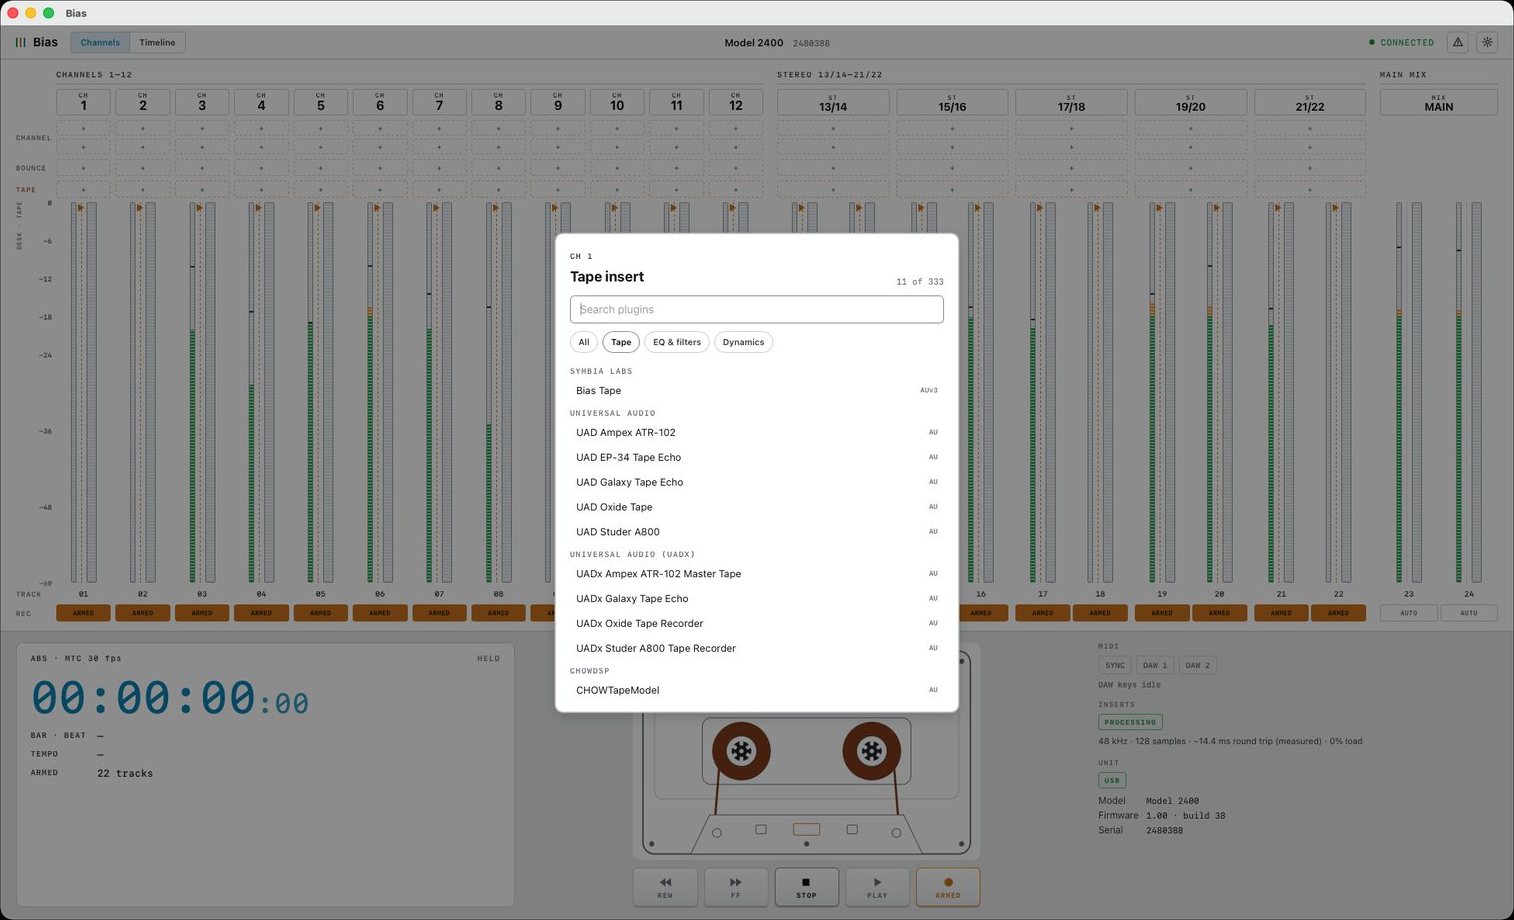
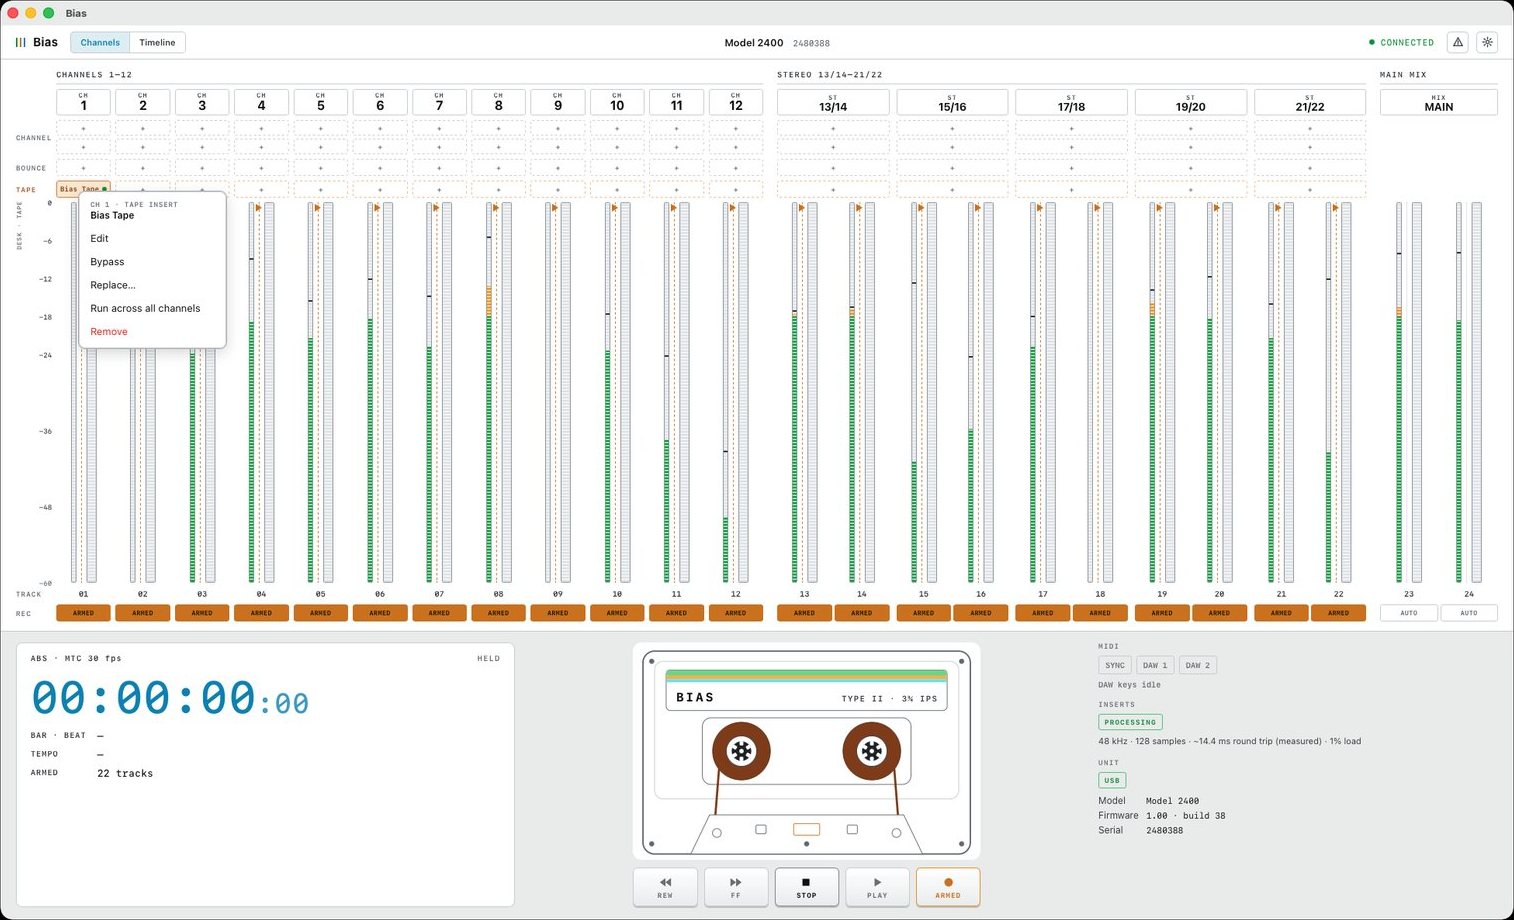
The picker for the tape slot. Channel slots list every Audio Unit effect on the Mac. Try Bias Tape in the tape slot. Right-click the slot and choose Run across all channels to put it on every strip at once.
-
Record and print
Arm the track on the mixer and record as usual. The counter and deck in Bias run with the recorder's timecode. Armed tracks light up on the bridge. With the switch on USB, the card records exactly what Bias returns to the strip, inserts included.
Bias listens to the mixer and never starts, stops or arms it. Transport and arming stay on the unit.
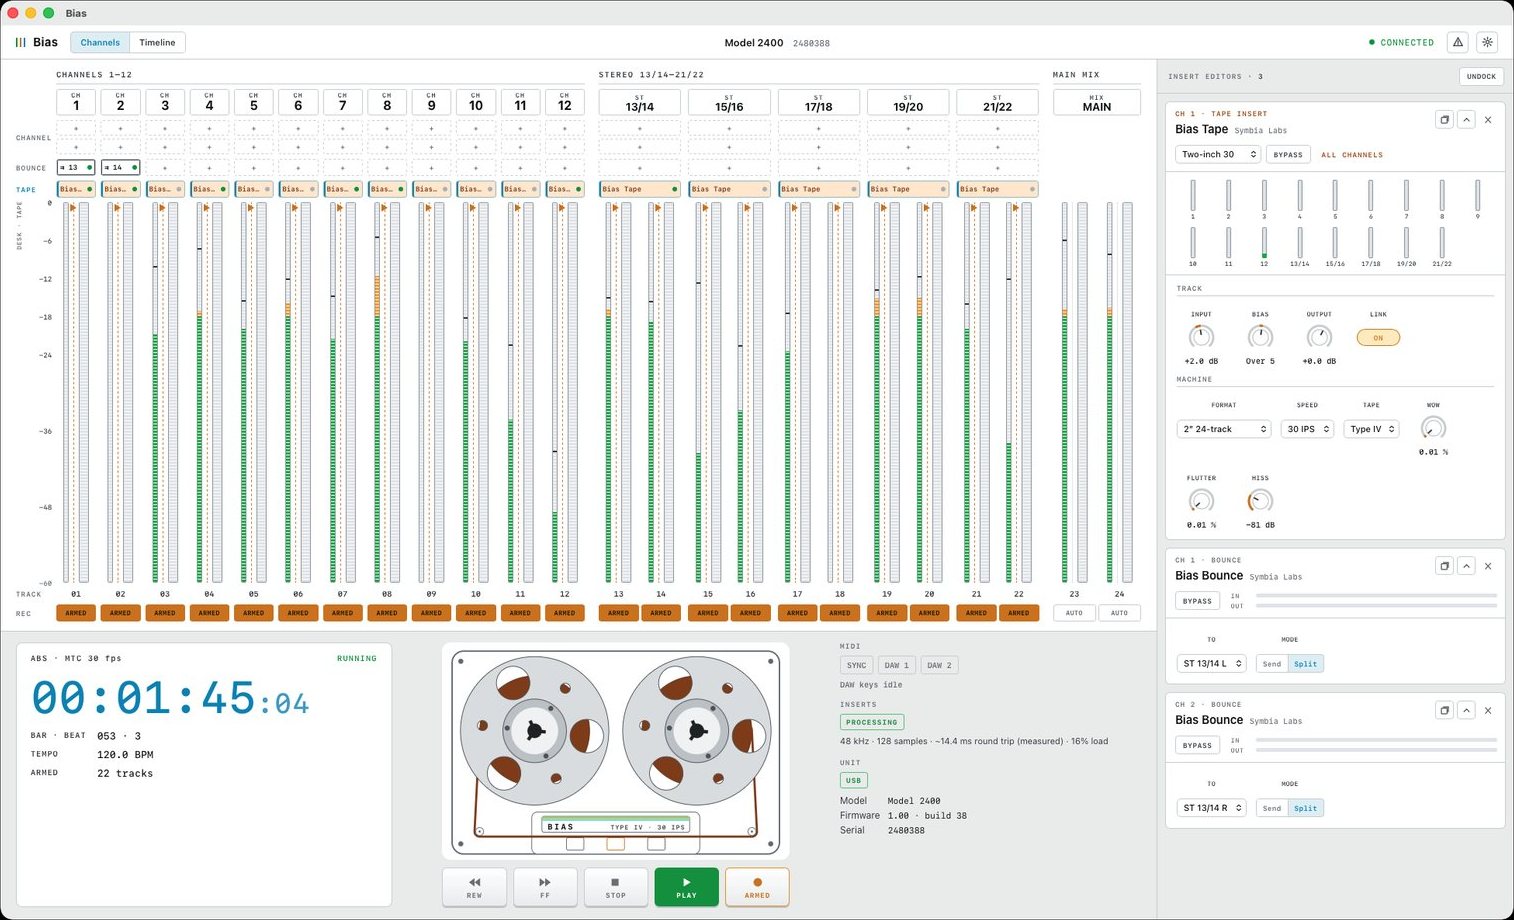
Mid-pass with Bias Tape on every channel and its editor open on the right. A printed track reaches the card one round trip late, about 9.5 ms at a 128-sample buffer. A smaller buffer under Settings › Audio shortens the delay.
-
Drop markers
Press M from anywhere to drop a marker at the recorder's position. Press ⌘2 for the Timeline, where markers, sections, punches and takes sit against the timecode. ⌘1 goes back to Channels.
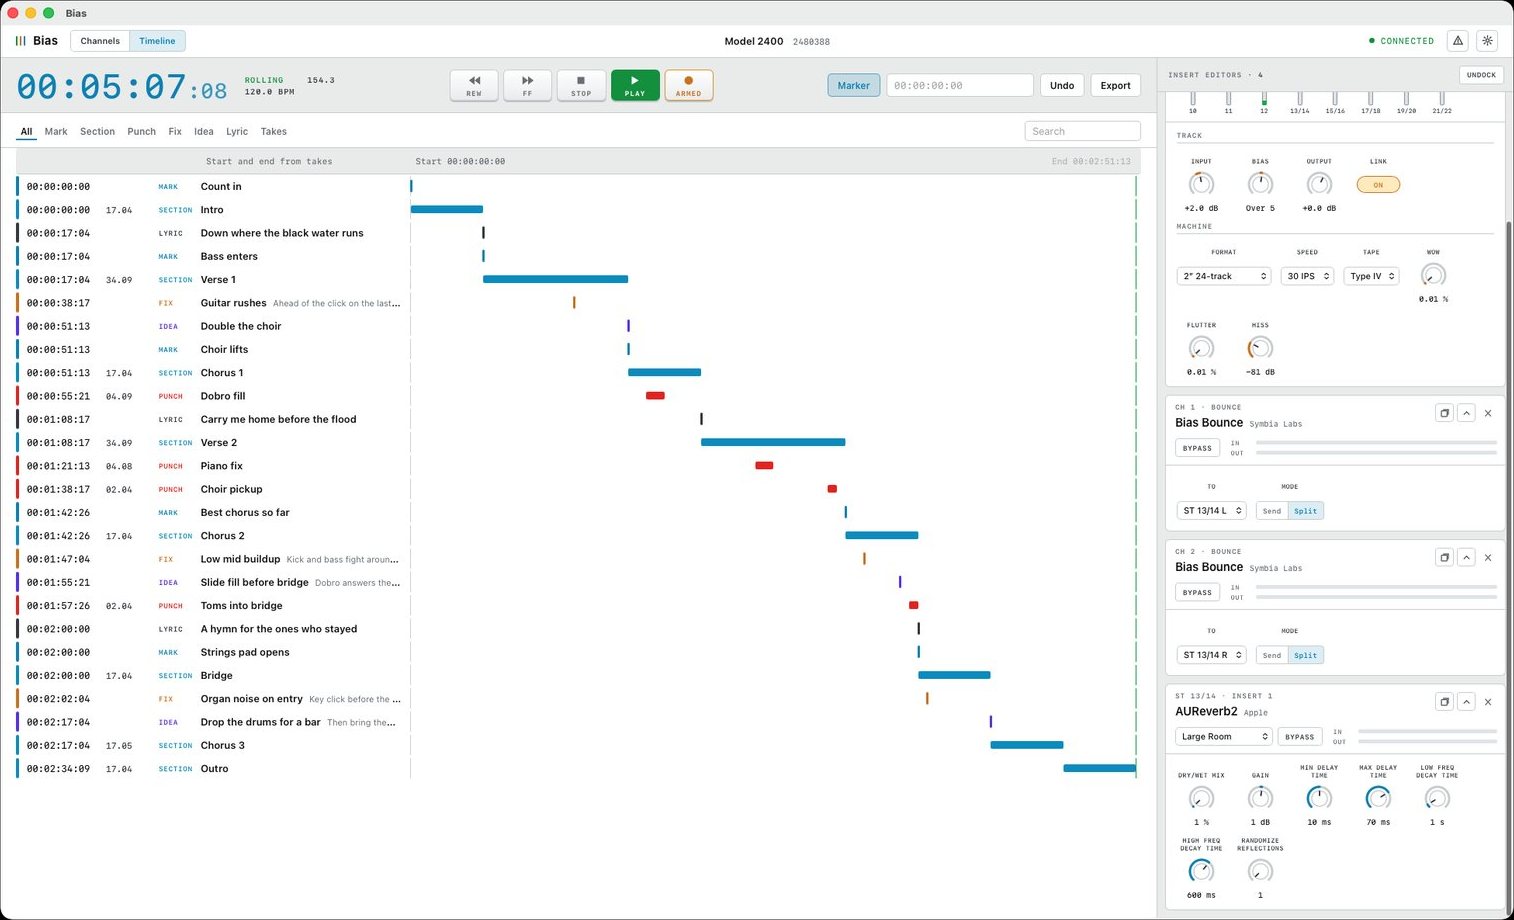
⌘E exports the markers as CSV.
Where next
- Bounce: play a recorded track back through inserts.
- Bias Tape: the tape model and its settings.
- MIDI: learn plugin controls from a controller.
- Troubleshooting, or write to help@symbia-labs.com.