Bias / Documentation
Bias documentation
Bias is a Mac companion for TASCAM Model mixers. New here? The Quick Start gets a processed track onto the SD card in ten minutes.
Overview
The mixer's SD recorder stays the tape machine. Bias works beside the recorder over USB, hosting Audio Unit effects on the mixer's channels and running Bias Tape, our own tape model. A deck and counter follow the recorder. Markers and takes sit against the recorder's timecode.
Bias follows the recorder and never drives it. Play, stop, record and arming stay on the mixer. Bias reads the position, the tempo, the arm state and the levels.
Install
Bias is a one-time purchase of $9.99 on the Mac App Store. Bias needs:
- macOS 13 or later, on Apple Silicon or Intel.
- A TASCAM Model mixer connected to the Mac by USB.
- Audio Unit effects installed on the Mac. Any Audio Unit effect or music effect works as an insert.
Allow microphone access when macOS asks. The mixer's USB channels arrive as audio input. Without microphone access, the inserts can't hear the unit. If you declined, turn microphone access on under System Settings › Privacy & Security › Microphone.
The window
Bias has two views, switched with ⌘1 and ⌘2. The gear at the top right opens settings.
Channels
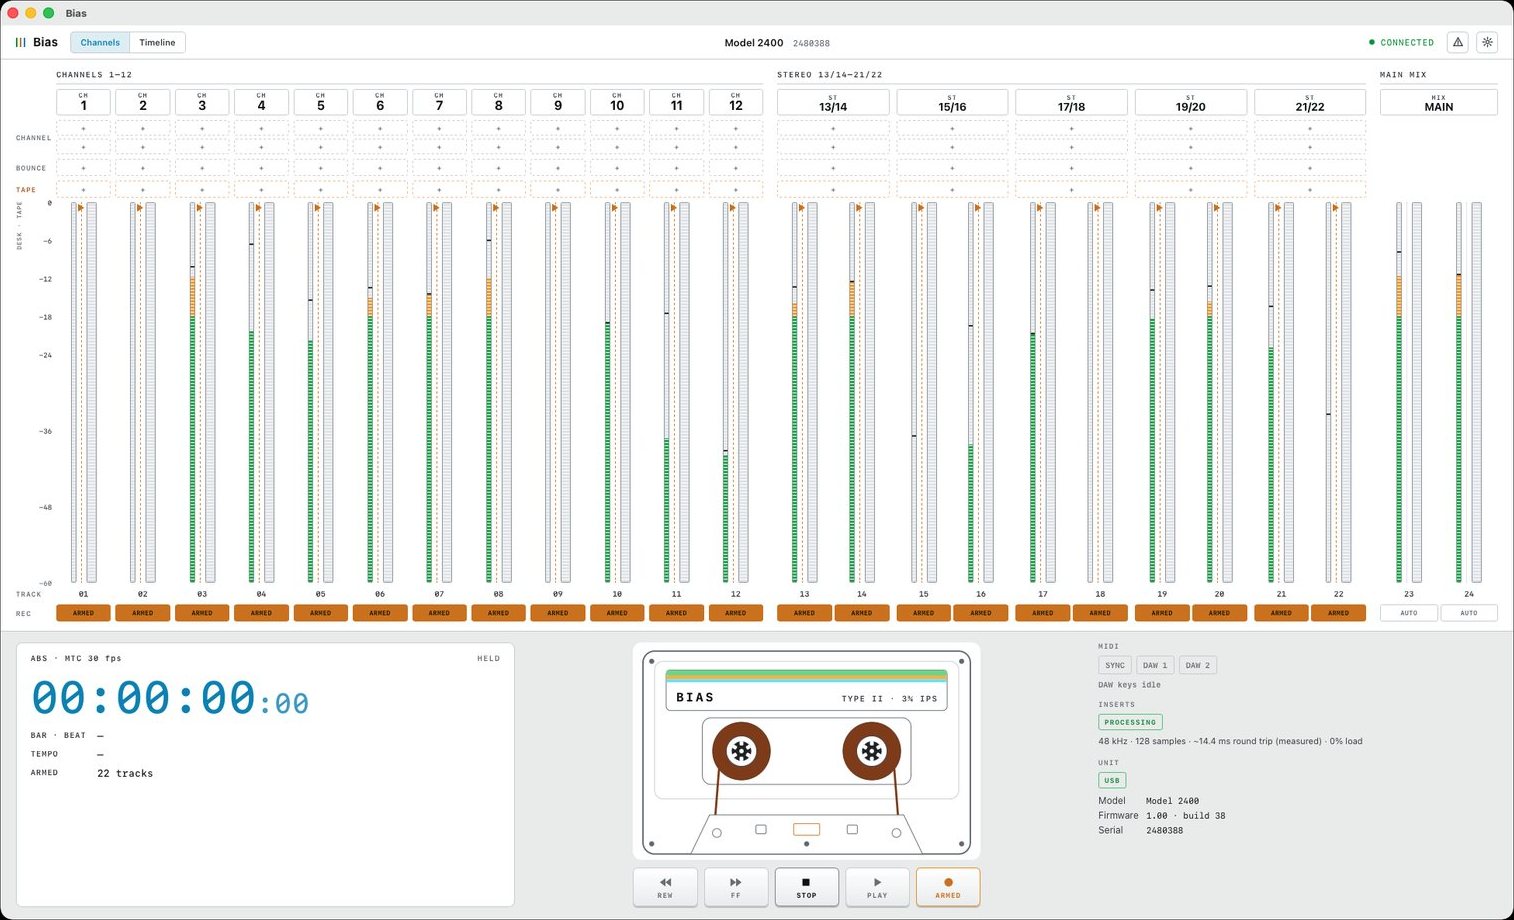
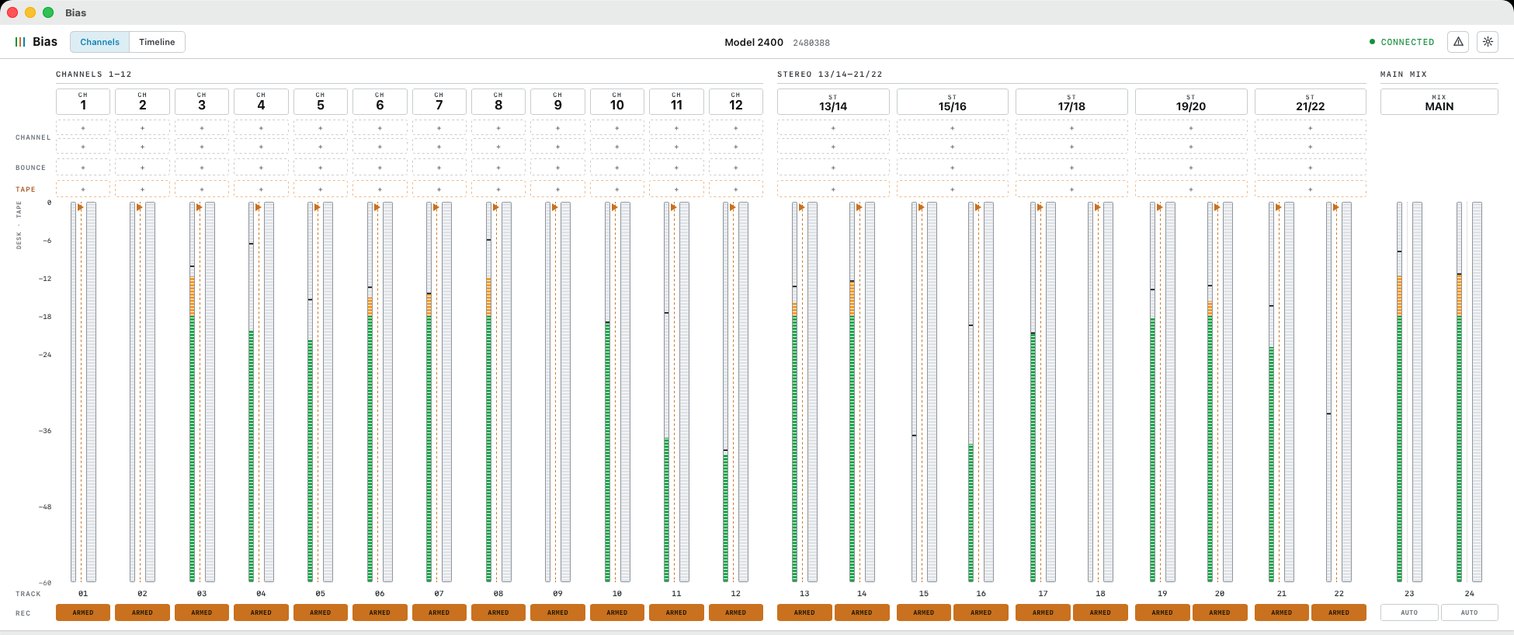
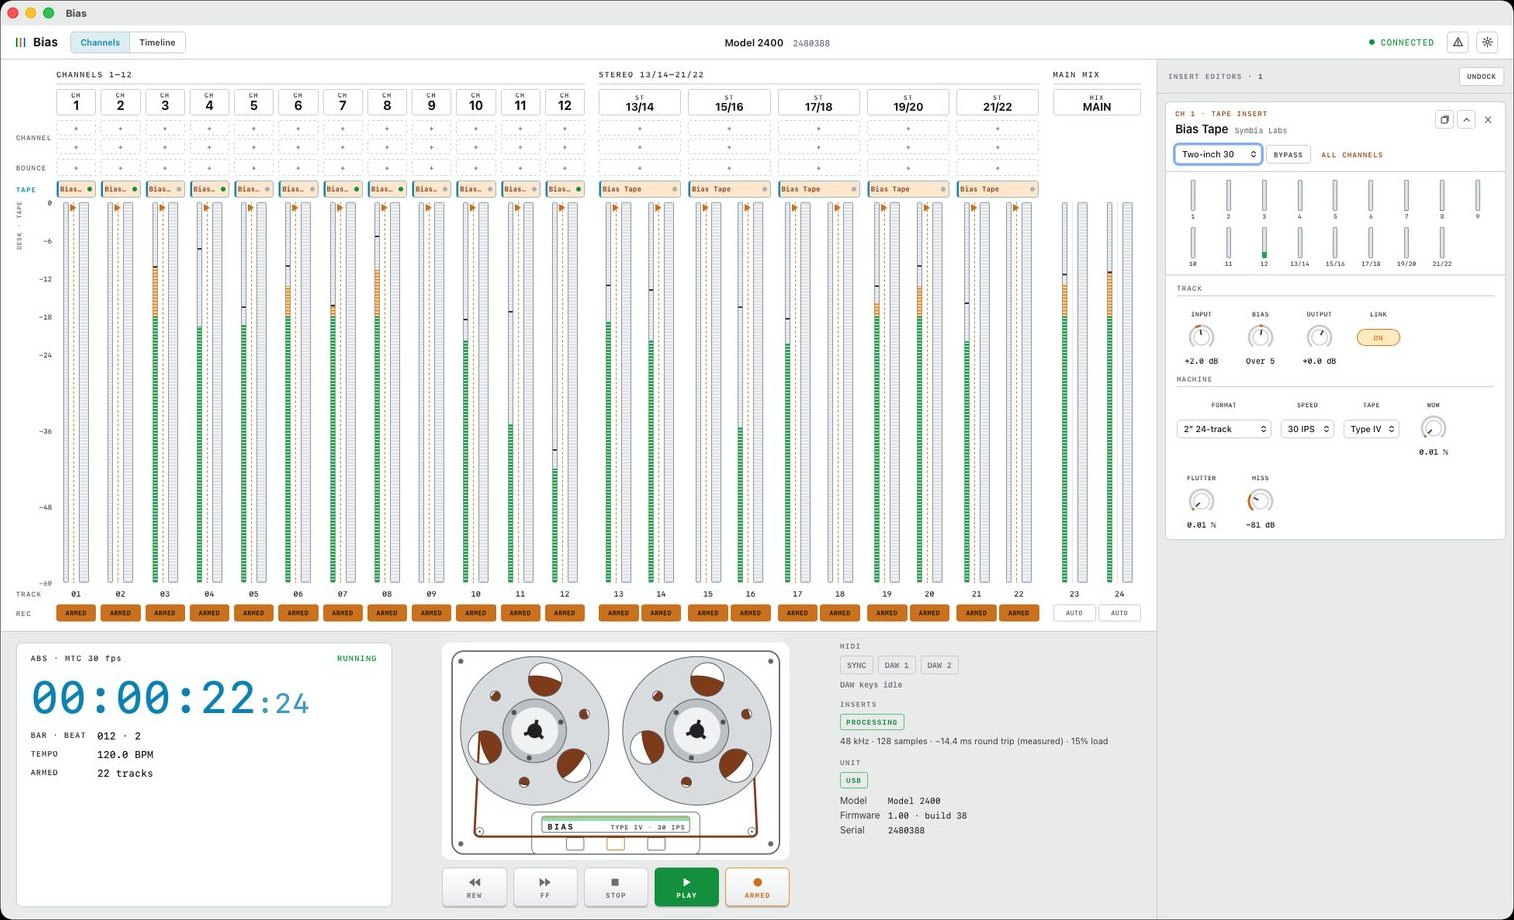
The meter bridge shows the mixer's channels against the recorder's tracks, laid out for the connected mixer, with the main mix at the end. Tracks armed on the mixer show as armed on the bridge. Under each meter sit the strip's insert slots. The deck and counter are at the bottom. The editor for the selected plugin opens in the dock on the right.
Timeline
The Timeline shows markers, sections, punches and takes against the recorder's timecode. See Markers and takes.
Studio
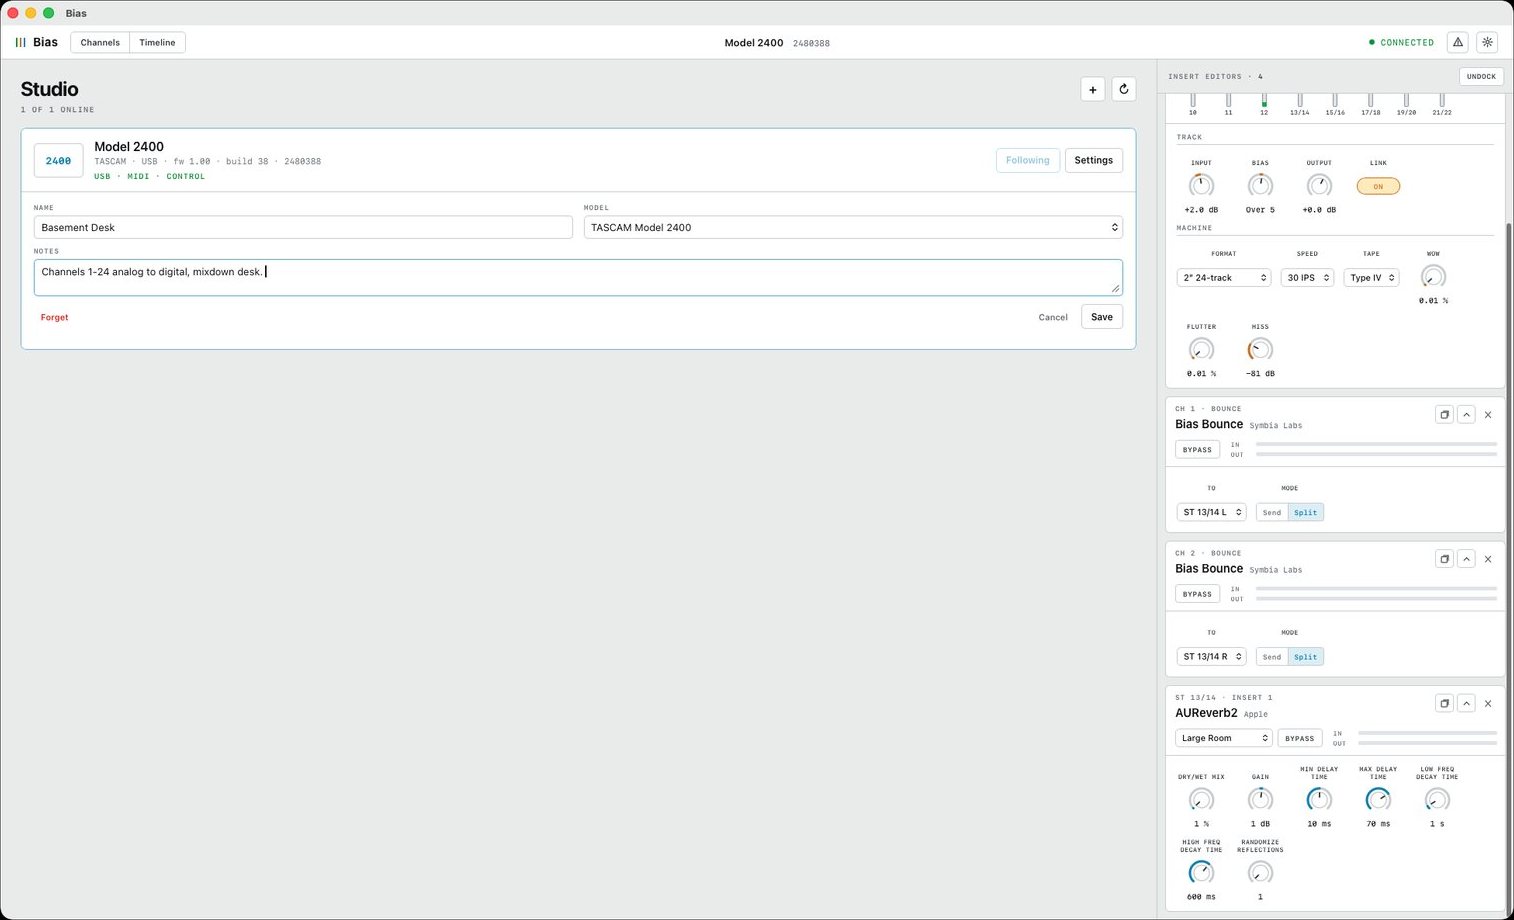
The Studio screen shows the mixer Bias is following and holds notes about your setup. Every mixer Bias has seen is listed on the same screen.
Channel switches
Every channel has a three-position source switch for analog in, USB and playback. The switch decides what the channel plays and what goes to tape.
| Goal | Switch | Channel plays | Tape records |
|---|---|---|---|
| Track through inserts and print them | USB | Bias's return | Bias's return |
| Play back what was printed | Playback | the SD track | nothing |
| Straight input, no inserts | Analog in | the input jack | the input jack |
On a mixer with a REC OUT switch, keep it off while the channel is on USB. With both on, the mixer sends the channel's return back to the Mac. Bias then processes its own output until the channel builds into loud noise. Bias watches for that loop and mutes the return within a fraction of a second, with a red MUTED strip head. Once the loop is gone, unmute the strip.
USB menu settings
On a mixer with USB settings in its menu:
- Choose PC ← MULTI and PC CH1/2 → CH1/2, so Bias's returns 1 and 2 land on channels 1 and 2.
- Set every channel to PRE CMP in the MTR/USB SEND POINT menu before arming. A later send point puts the channel's return back on its USB send. Arming a channel with inserts then starts a feedback loop.
Timing
A printed track reaches the card one Bias round trip after the input jack, about 9.5 ms at a 128-sample buffer and 44.1 kHz. The print sits that much late against tracks recorded dry in the same pass. A smaller buffer shortens the delay. Settings › Audio offers 32, 64, 128, 256 and 512 samples.
Inserts
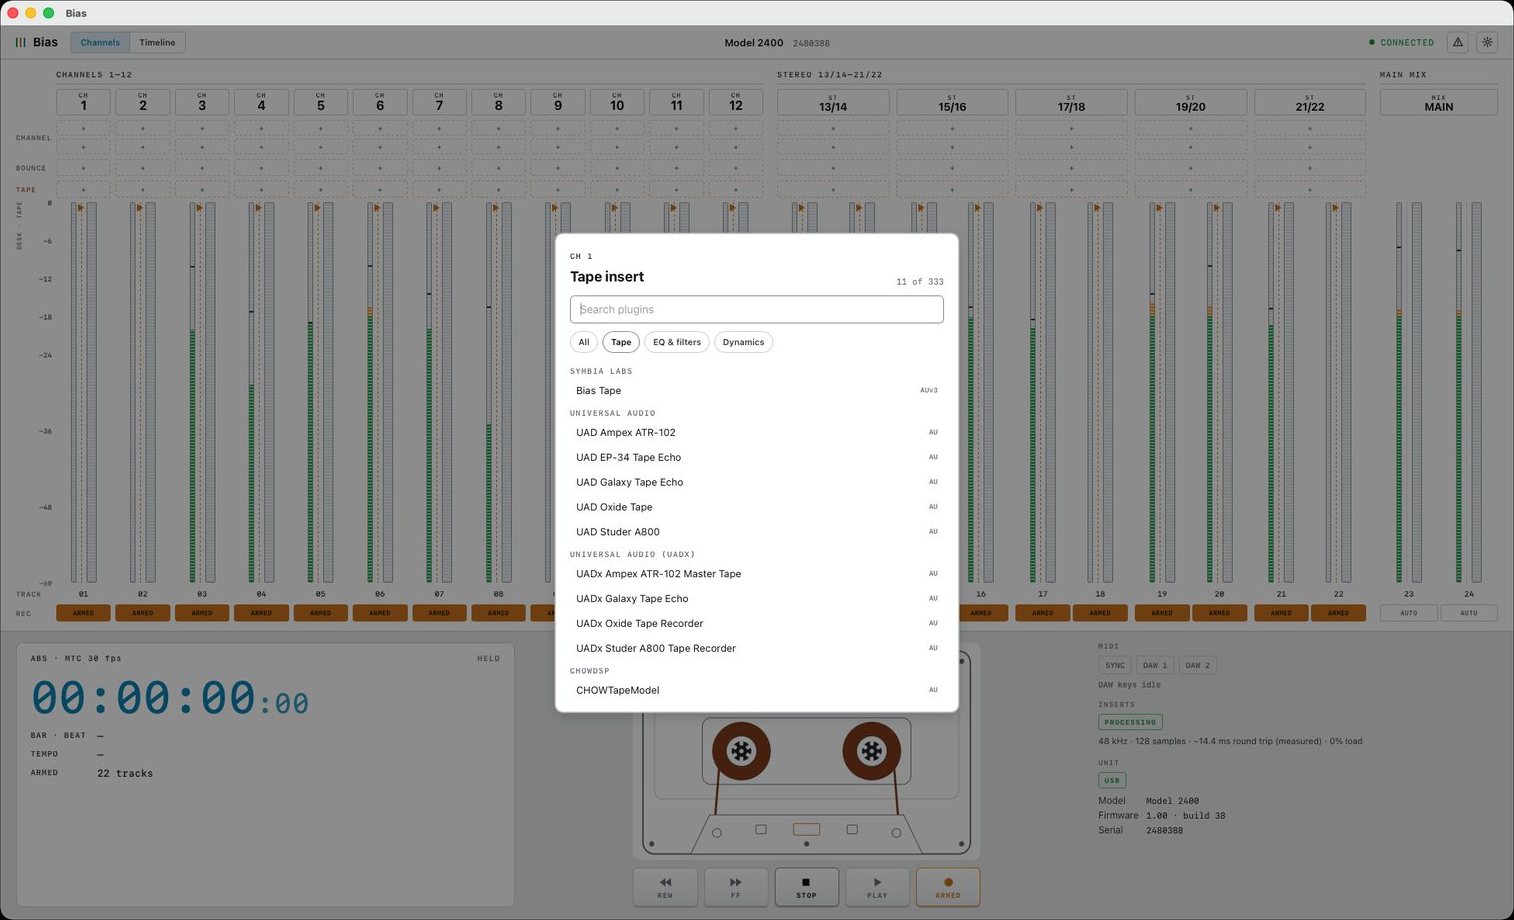
Every strip has two channel inserts, a bounce slot and a tape slot, run in that order. Click an empty slot to open the picker. The list covers the Audio Unit effects installed on the Mac, with a search field and filters. The plugin loads with its editor open in the dock on the right.
Right-click a loaded slot for its menu:
| Item | Does |
|---|---|
| Edit | Opens the plugin's editor in the dock. |
| Bypass / Enable | Takes the slot out of the chain and puts it back. |
| Replace… | Opens the picker for a different plugin. |
| Run across all channels | Loads the same plugin on every strip (tape slot). |
| Remove | Empties the slot. |
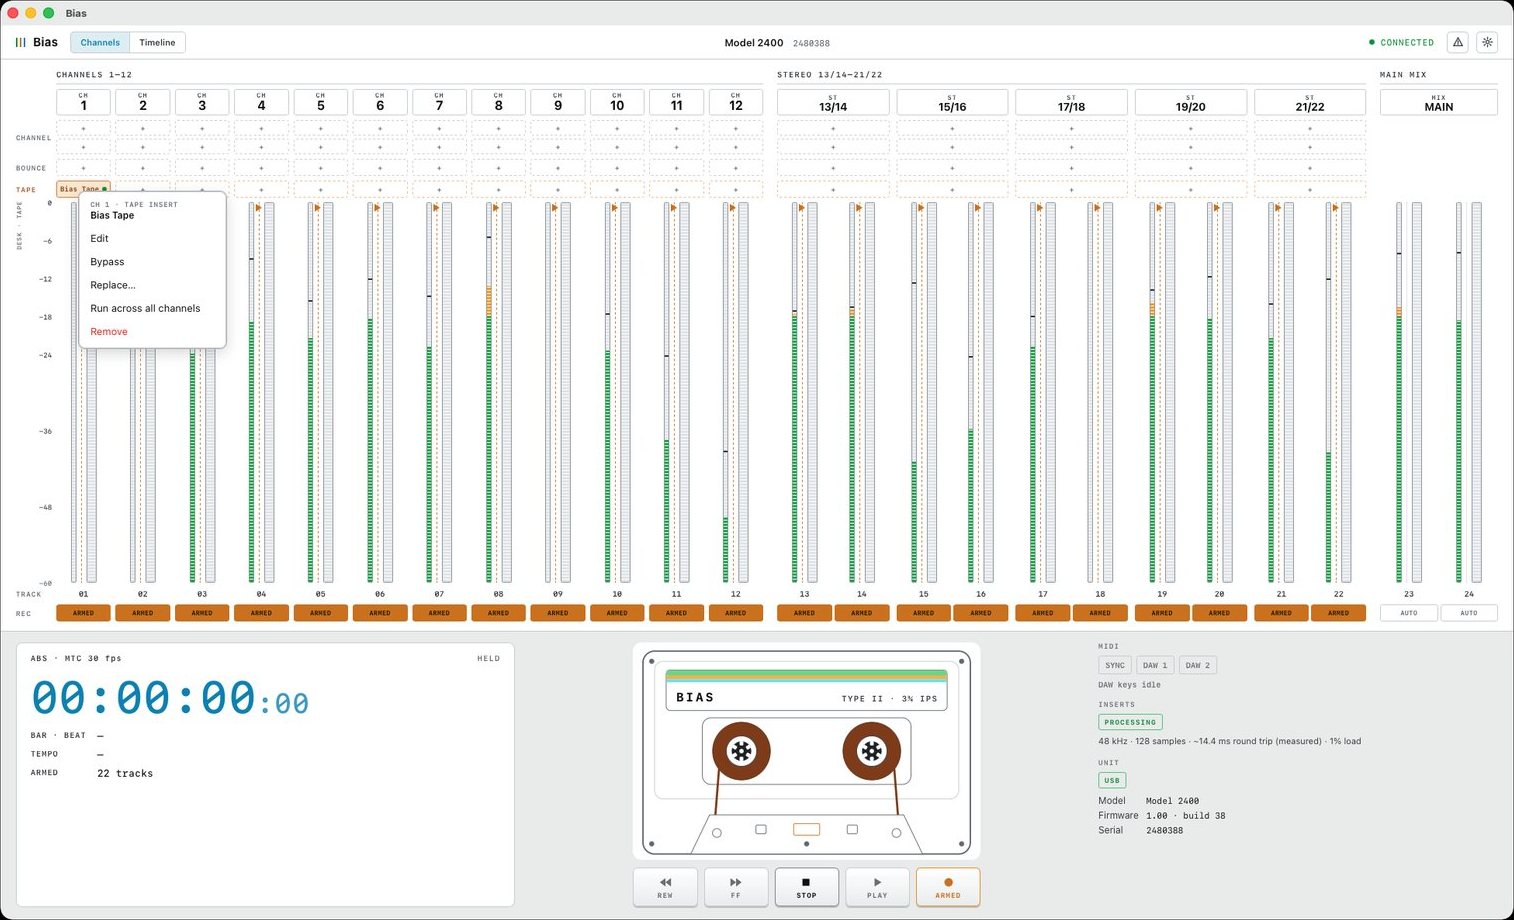
The editor opens in the dock. Any plugin can also be undocked into a window of its own. Plugin settings save with the song.
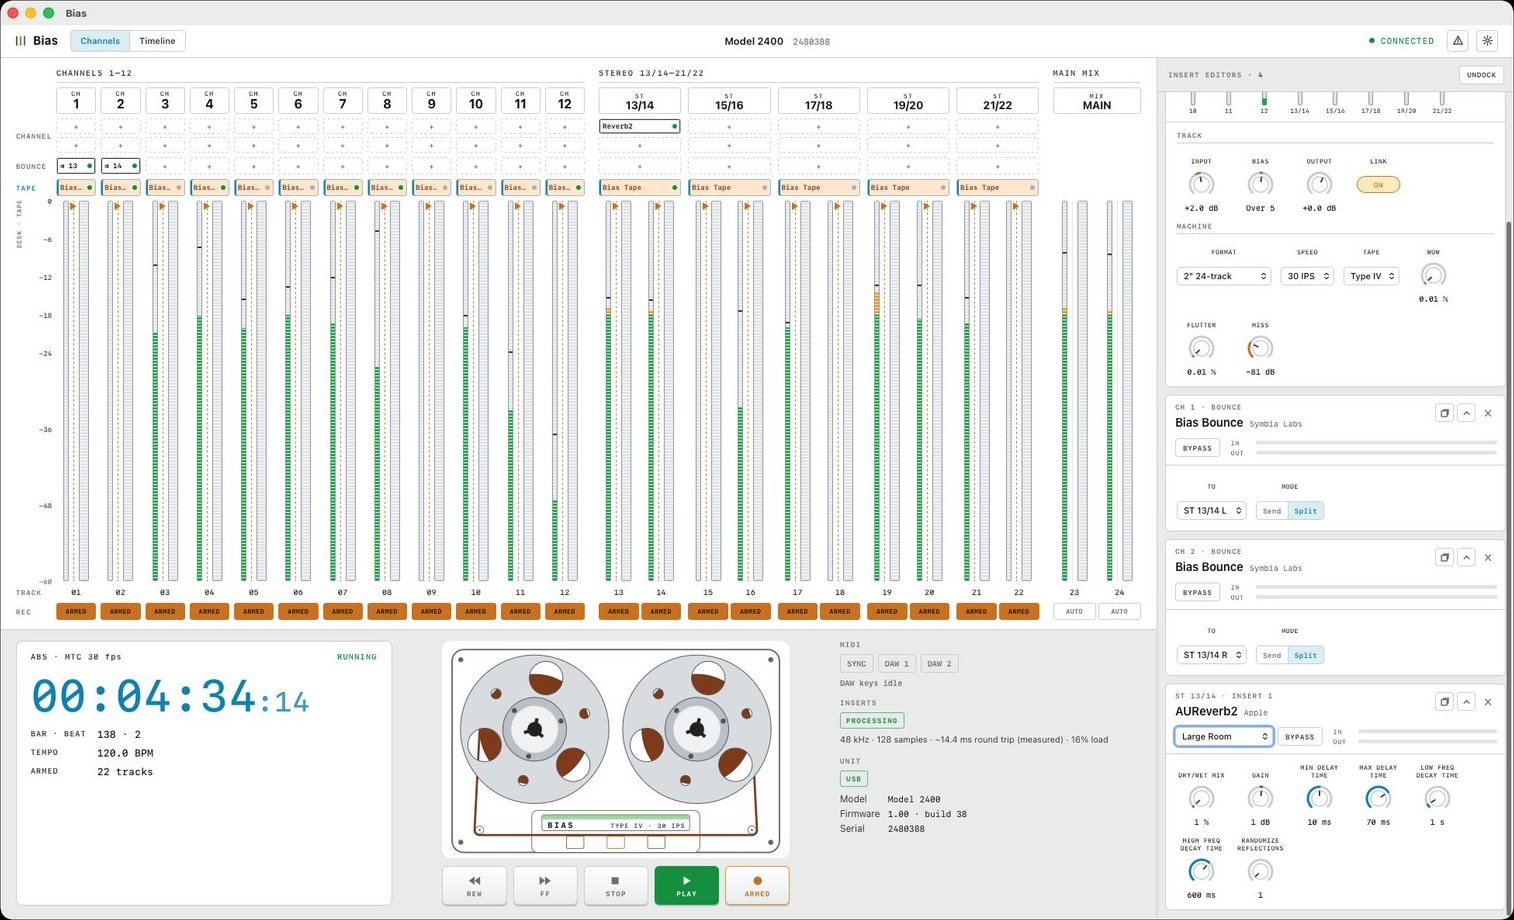
Bias Bounce
A channel on playback plays the card and never its own USB return. A recorded track therefore can't run through that strip's inserts. Bias Bounce sends a strip's signal, after its channel inserts, onto another strip's input, ahead of that strip's inserts and tape. The receiving strip plays the bounced signal through its own chain.
- On the channel holding the recorded track, set the switch to playback and send the track to USB (REC OUT on, where the mixer has a REC OUT switch).
- Click the strip's BOUNCE slot. Bias Bounce loads with its editor open.
- Pick the receiving strip in To. That channel's switch goes to USB, with nothing in its input jack.
- Bring up the receiving strip's fader. To print the result, arm its track.
Send stops the sending strip's own return. Split keeps that return and sends a copy. Bounces onto one strip add together. A mono strip lands on one side of a stereo strip (for example 17/18 left or right on the Model 2400). A stereo strip lands on a whole stereo strip. No strip can bounce onto itself. The slot reads → 17/18 for a whole strip and → 17 or → 18 for one side.
The bounce is one round trip late against the dry tracks, as with any printed insert.
Bias Tape
Bias Tape is our own multitrack tape model. Put Bias Tape in a strip's tape slot, or right-click the slot and choose Run across all channels to load it on every strip. The white paper covers the measurements and the method.
The settings come in two groups:
- Track settings apply per strip and include Input, Bias, Output and Link.
- Machine settings are shared by every linked track and include Format, Speed, Tape, Wow, Flutter and Hiss.
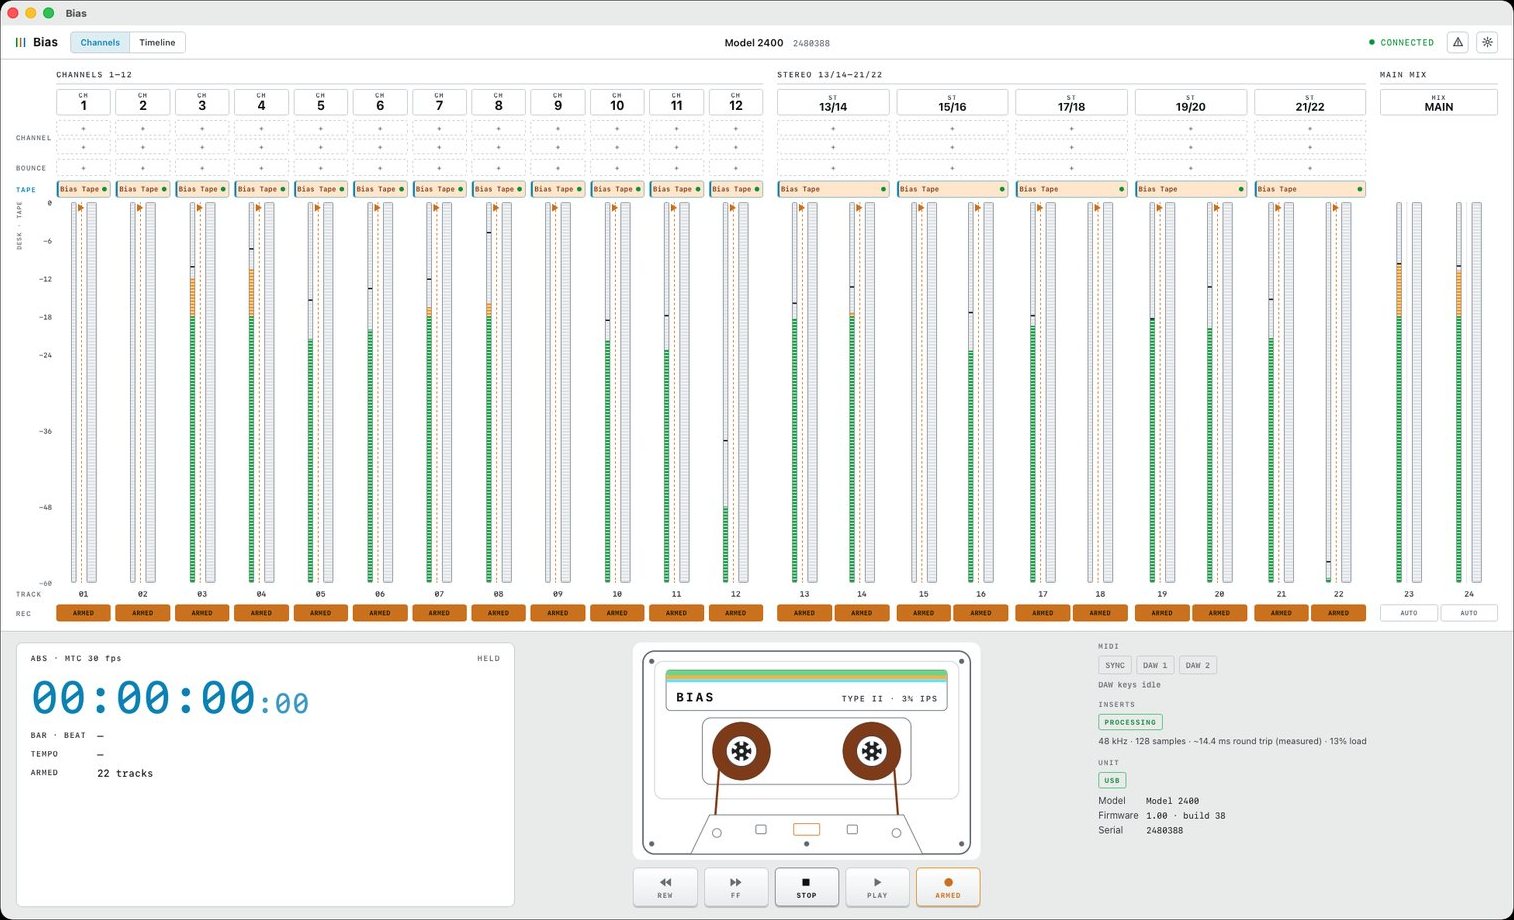
Deck and counter
The deck and its counter run with the recorder's timecode. The machine settings in Bias Tape choose what the deck shows, either a cassette or reels at 7 inches or 10½ inches, labeled with the tape and speed.
Markers and takes
Markers sit at exact timecode (30 fps) and can be points or ranges. Each marker has a name, a kind, a color, tracks, notes and a rating. The kinds are mark, section, punch, issue, idea, lyric, start and end. Issues carry a fixed flag. The Timeline filter can show open issues only.
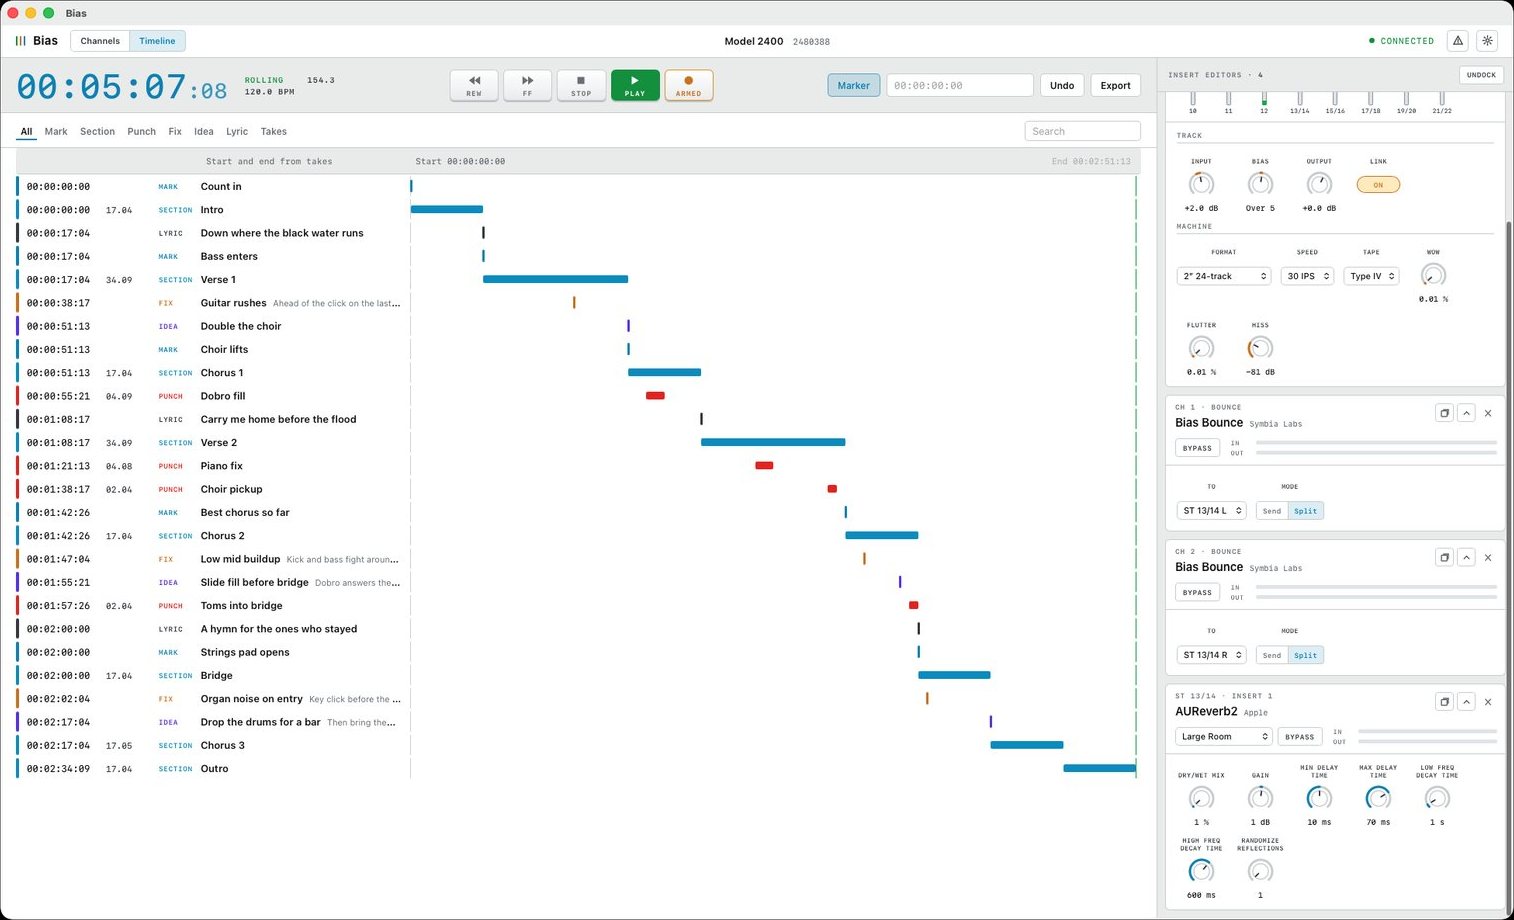
Bias also logs each pass of the recorder as a take, with its rating, a keep flag and notes. Bias sets the song's start and end from where the audio begins and ends.
Keys
| Key | Does |
|---|---|
| M | Marker at the recorder's position, from any view |
| ⇧M | Marker, then name it |
| ↑ ↓ | Previous or next marker |
| ← → | Nudge a frame (⇧ a second, ⌥ a bar) |
| [ ] | Move the start, or set the end to now |
| Enter | Rename |
| N | Notes |
| K / ⇧K | Next or previous kind |
| C | Next color |
| 1–5, 0 | Rate; clear the rating |
| D | Done or fixed |
| T | Select the marker nearest now |
| G | Add a marker at a typed timecode |
| / | Search |
| ⌫ | Delete |
| ⌘Z | Undo |
| ⌘E | Export CSV |
| ⌘1 ⌘2 | Channels, Timeline |
Export
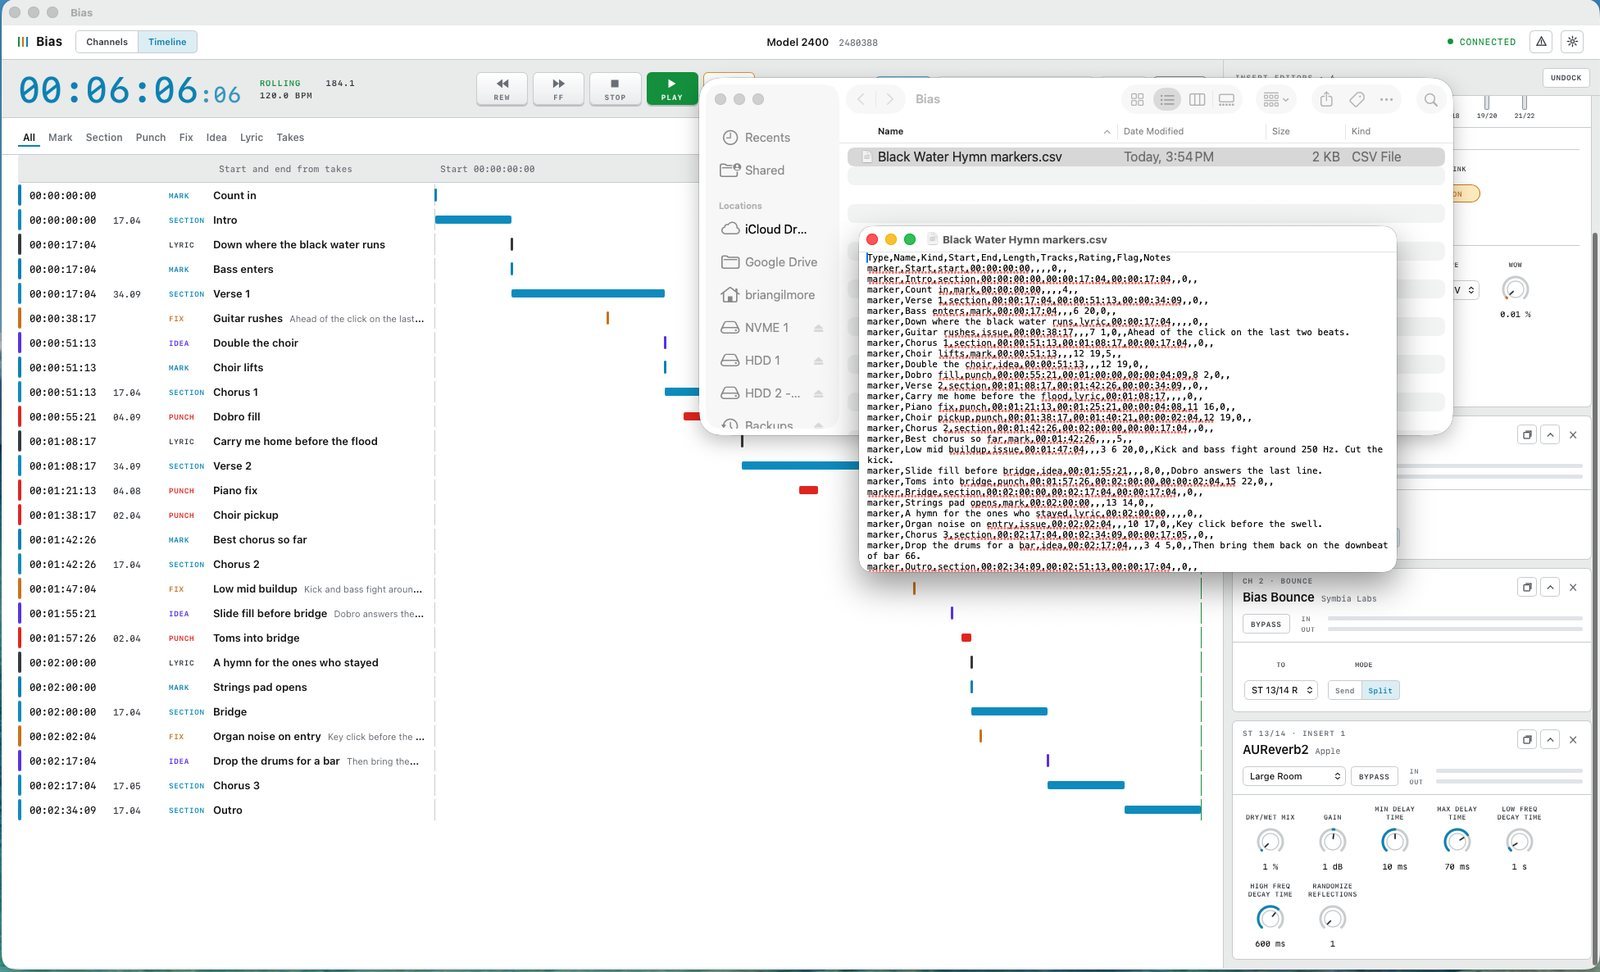
⌘E writes the song's markers to a CSV file, one row per marker.
Songs
Each song keeps its own inserts and their settings, markers, takes, notes and tempo. Switching songs waits for the recorder to stop, since a strip on USB records whatever Bias returns.
MIDI
Mappings live in Settings › MIDI. Choose an input, or all inputs. Heard shows the last message that came in. Click + Mapping, pick a target, then move a control on your controller.
Targets include:
- every parameter of a loaded plugin, its Bypass, its next, previous or chosen preset, and opening its editor
- bypassing a strip's inserts, or every insert
- dropping a marker, a fix, an idea, a section or a punch
- the next or previous song
Each mapping has a mode (Auto, Absolute, Relative, Toggle or Momentary) and an optional pickup that keeps a parameter from jumping. You can switch a mapping off without removing it.
From a plugin's editor, right-click a knob, switch, Bypass or the preset menu to Learn, Pickup or Forget that one control.
The mixer's own MIDI ports carry timecode from the recorder and accept nothing for transport. A MIDI controller drives Bias only.
MCP
While Bias is open, it serves the Model Context Protocol on http://127.0.0.1:4848/mcp. Bias accepts local connections only. Settings › MCP turns the server on or off and lists every call with its arguments and time. An agent can read the meters and levels, list plugins, load, set and bypass inserts, load presets, read and add markers, and read the take log.
To connect Claude Code:
claude mcp add --transport http bias http://127.0.0.1:4848/mcp
Changes to inserts, parameters, presets and songs are refused while the recorder is rolling, since a strip on USB records what Bias returns. An agent that must change something mid-pass passes force. No agent can start, stop, locate or arm the recorder.
Ledger
Bias records every change to a song's markers, takes and setup in a ledger beside the song. Each entry names who made the change, whether you at the window, a MIDI controller, an MCP client by name or the recorder itself. Entries are chained and signed with a key held by your install. Nothing is rewritten. An edit or a delete adds a new entry. An MCP client can check the chain and signatures with verify_ledger.
Settings
The gear at the top right opens four tabs.
| Tab | Holds |
|---|---|
| Appearance | System, light or dark; text size. |
| Audio | The audio device and the buffer size, 32 to 512 samples. |
| MIDI | Inputs and mappings. |
| MCP | The server switch and the call log. |
Troubleshooting
Bias says the unit is not connected
Check the USB cable and that the mixer is on. If you have more than one mixer, the Studio screen shows which one Bias follows.
The inserts are silent
Confirm microphone access for Bias in System Settings › Privacy & Security. Then check that the channel's switch is on USB and the slot isn't bypassed.
A strip goes loud and then mutes
The loop guard mutes a strip when its return reaches the Mac again. Turn REC OUT off, or set the send point to PRE CMP, then unmute the strip.
A plugin loses its settings or glitches
Try a larger buffer under Settings › Audio, and send us the plugin's name.
Tell us
Click the ⚠ at the top right of the app. Your mail app opens with a message to help@symbia-labs.com already filled in. Bias sends nothing on its own.